I was born with a scar in the back of my retina in my right eye, blocking all vision except for slight exterior peripheral. I take great care of my left eye because, it’s basically all I got. I’d like to say this little “set back” has actually made me a better photographer in the long run. I’m more focused on what’s inside my viewfinder than out.
A few steps for how to take beautiful photos.
I never let this stop me from doing anything I wanted to do, I never really knew any other way. I love seeing things for the beauty they possess and helping others see it too. That’s why, today, I’d like to let you in on a few little secrets to see the things around you in a different light (like literally).
It doesn’t matter if you’re taking photos with your phone or a fancy pants camera, you can learn to take beautiful, light, airy, frame worthy photos in just a few steps!
Let me teach you, with my blind eye and all, a few tips on how to take beautiful photos.
Step 1: Step Back Zoom In
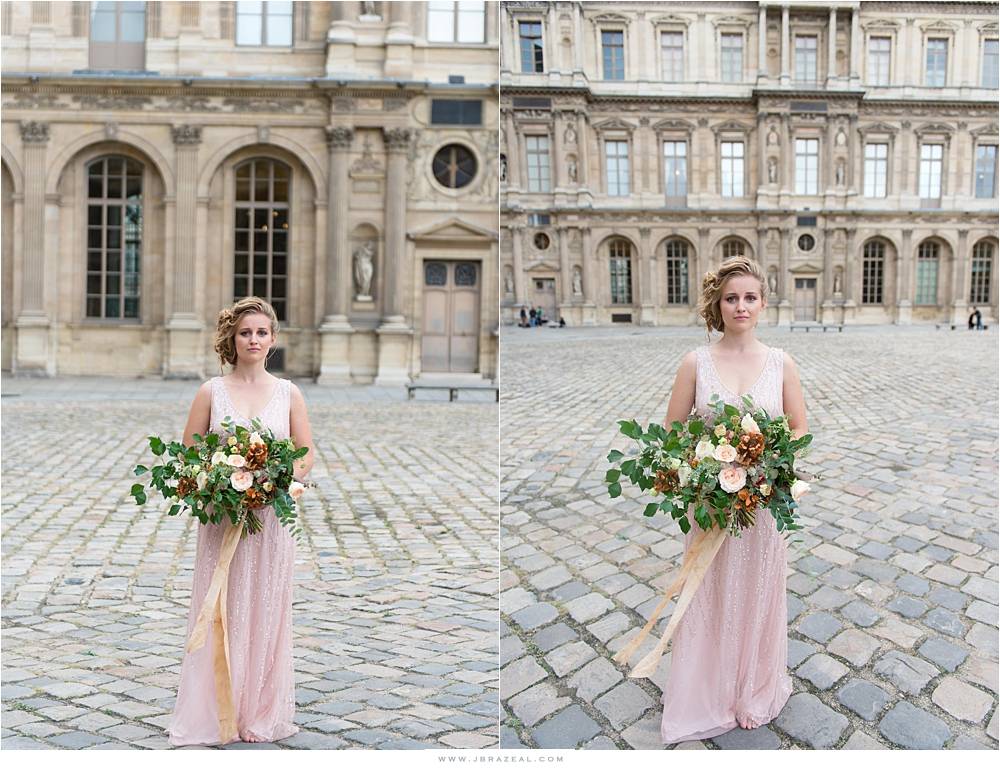
This title kinda gives it away. But let me elaborate. Instead of standing close to your subject with the phone or lens zoomed out making your subject look elongated and the sides of the image stretched, take a few steps back and zoom in. This puts your subject and the surroundings in proportion. In this image below the girl stayed exactly where she was. All I did was take a few steps back and twist my lens to zoom.

LEFT image is zoomed in: Notice all the lines on the ground and even the windows behind her, how they all change. It tends to clean up the image.
Step 2: Off the Wall
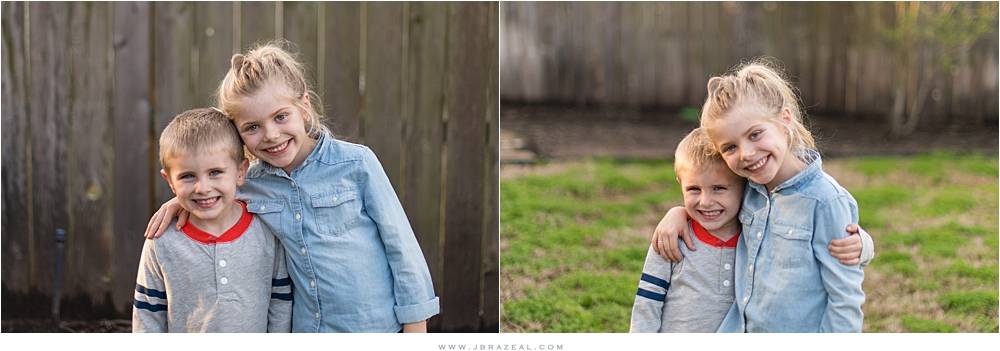
In most snapshots and quick photos we tend to stick people in front of a wall or flat background. In our minds, it’s clean, even and fewer distractions. But this can flatten the image and make it feel blah.
To put more depth and beauty in your image have your subjects take a few steps forward and if you’re using a fancy camera this would be the time to drop your aperture to something a little wider so the background blurs out (wider would be f1.4 or as high as f2.0) Check out this little nugget down here. The only change I made was to have these cuties walk forward and click the pic again off the wall. Blah to Beautiful in that one simple step.

Step 3: Grab the Guide
I’m totally baiting you here. I’m giving you the first 2 tips but you have to grab my guide to get the 3rd (and most amazing) tip. Mostly, cause I want you to have a guide to print up and stick on your desk or fridge so you take stunning pics of your everyday life!
You are loving this, you already have your mind working and thinking of the next time you can put these tips into practice cause, they so easy! Once you grab the guide and see what the final step is (the real doozy) you’ll practically be a PRO!


